Go ahead, I'll wait.
I'll bet you read the caption before you really looked at the graphic. Am I right?
Of course I am. Duh.
Captions — or legends, as we call them in textbook publishing — are small but extremely important bits of information. They're not terribly difficult to write if you keep just a few tips in mind.
#1 Decide on the style.
Decide on the legend style you and your publisher prefer. For textbooks, we tend to use a quite brief style, with just a few words explaining the image. However, some books require more comprehensive legends.
Here are two images, one with a brief legend and one with a more comprehensive one.
 |
| Normal chest X ray |
 |
| This X ray shows the heart and lungs in a patient without lung or cardiac conditions. |
#2 Maintain a consistent style.
Whichever style is used, make sure every legend is consistent in format and tone. Try not to flippity-floppity from one style to another.
The exception is for multi-part images, such as the one below. Most legends in this particular book are brief, but a number of them add comprehensive descriptions of selected parts of the image.
The exception is for multi-part images, such as the one below. Most legends in this particular book are brief, but a number of them add comprehensive descriptions of selected parts of the image.
#3 Explain all callouts and labels.
 |
| From Practical Radiology: A Symptom-Based Approach |
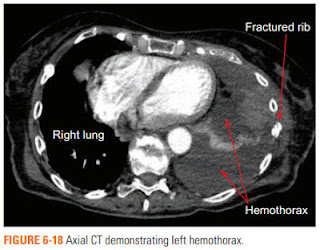
In the image at right, the callouts are "Fractured rib" and "Hemothorax".
The text "Right lung" is a label. Labels are used to identify large sections of a graphic or to distinguish one part from another part.
If your image has callouts, make sure to explain them in the caption. (I would have been happier if the image at the right had mentioned the fractured rib, which the running text did but not the legend. Oh, well.)
#4 Make references to items in image clear and uniform.
When you have more than one item you're highlighting in an image, make sure the references to those items in the legend follow a clear, logical progression. Here's an example:
Notice how the legend takes on an A-B-C sequence. Do the same thing for callouts in, say, an illustration of the femur. If the callouts start at the top and work their way down, do the same with any reference to the callouts.
#5 Double-check all legends on page proofs.
Always — ALWAYS — double-check legends when you have final art. You would be amazed at the number of ways such a little item can get all bunged up.
Legends may be little, but they're key elements of a solid textbook.
Legends may be little, but they're key elements of a solid textbook.


No comments:
Post a Comment